Saturday, December 31, 2016

Masking data in Hyperion Planning

It's been a while since I posted and I'm going to write a quick one, every consultant is going to be asked at some point in any project to mask the client's data for testing purposes etc. and as I'm sure you know there is no out of the box functionality to do this, only workarounds like:

1. Apply a certain percentage on the whole data base, for example multiply by 0.45656 , but the drawback here that if you know any of the real figures before masking, you can figure out the actual numbers by working out the multiplier.

2. Apply a certain percentage on part of the data base (For example expense accounts 0.56 , revenue 0.434...) and this is of course better than the first method, but if the client wants more complex logic then this will not work.

3. Write a Java CDF that looks like this:

compile the project, get the .jar files, and follow the CDF registration as specified by Oracle documentation. then you can call that CDF in your calc script (@Random()).

4. Write a Groovy CDF using the new Calculation Manager CDF @CalcMgrGroovyNumer, thanks to Celvin's excellent article in Oracle community forums, we actually know how to use the new Groovy CDFs.

I remember two years back in an Oracle client event in Dubai, the Oracle EPM US team (Marc Seewald specifically) mentioned Groovy and its pivotal role in the product road map, I remember asking Marc what is the alternative to Java CDF in PBCS and he simply said "Groovy", at that time it was not clear to me, but after seeing the two new functions, it is starting to make sense.


So lets get on with it, first I want to make sure my Groovy script is actually working, I use the Groovy console, simple and easy to install. as you can see below the function is working and returning random numbers.


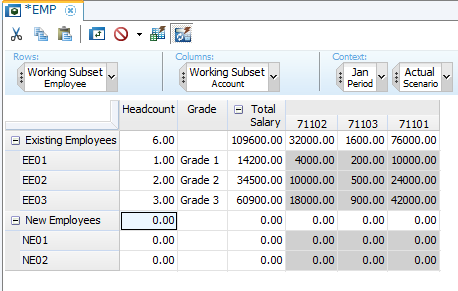
And this is my form with the data I want to mask:


I'm using the same value (100) to highlight the different results and make sure we are getting the data masked 100%.

Now my calculation script:


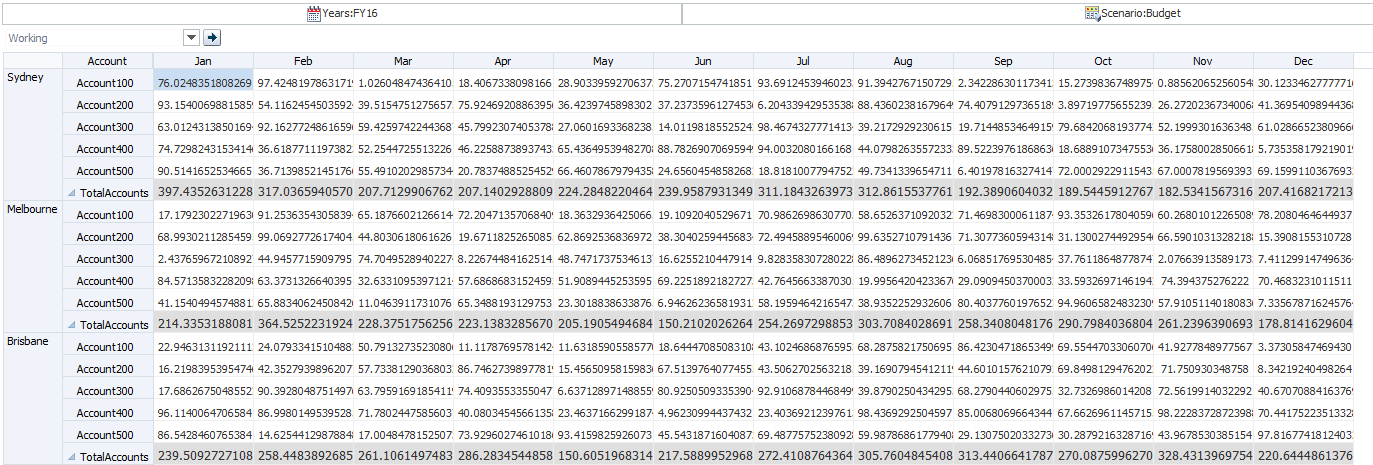
Its a simple function, not passing any parameters just returning a random double, and using it to mask my data. after executing this script I'll get the following results:


Looking at my masked data here, you can easily work out the Dense/Sparse configuration in my outline. what you see above is a random double for every block (hence Sydney has 64.1346... across all dense members).

To fix this, we can either change the Groovy function logic or use @CalcMode(Cell) setting in the script as follows:


I just added

So now lets try with the new setting  (I resetted the values to 100) and  ran the script again.


Voila! data is masked and looking meaningless, and no similarities whatsoever.


Happy New Year :)

May the Cosmos be with you!


Sunday, November 20, 2016

Smart Lists (Pick Lists) in IBM TM1

I'm going to write about a fascinating topic in TM1, working with Hyperion we all know Smart Lists and Attribute dimensions, Smart List is a drop-down menu you assign to a member which you can use with calculations or even reporting in some cases. As for attributes they are mainly used for reporting, they still can bee very useful in calculations, yet they are best known when it comes to reporting.

I want to show the equivalent of Smart Lists and Attributes in TM1,which is really interesting, at least for me.

This is my application server with the standard dimensions:


I have two cubes (Assumptions and EMP)


In TM1 your assumptions are most likely going to be a separate cube designed solely for that purpose, unlike Hyperion Planning this case is almost non-existent, assumptions are usually stored in unique intersections within the main cube.

As shown above, my Assumptions cube has two dimensions Account and Grade. my data form/view holding my data looks like this:


Very simple example, I'm having the basic salary, general allowance, and housing allowance (as a percentage of general allowance).

Now my EMP cube:


I don' have a grade dimension here, instead I'll be using a member in Account dimension, and I'm going to assign a Smart List linked to Grade dimension (the interesting part about this post). In TM1 Smart Lists are called PickLists, and you define them using Attribute Editor as shown below:


What I'm doing here is assigning the values of Grade dimension (from another cube) to one member in another cube that does not have the grade dimension. and it looks like this:


Now based on the headcount and the grade, the total salary is getting calculated using the data entered in assumptions cube.


In my main DB function (Assumptions cube) and I'm nesting another DB(EMP cube) to get the value from Assumptions cube based on the grade Account used for that specific intersection in EMP cube.


Change the data and save and your accounts are updated automatically.


So in a nutshell, I managed to optimize the EMP cube by not including the Grade dimension, and instead used a Smart List (PickList).

Pretty cool if you ask me, that is it for today.


May the Cosmos Be With You


Monday, October 24, 2016

MDX, Maxl, and Business Rules

In this post, I'm going to write about tweaking MDX and Maxl in business rules, I found this to be quite useful in numerous times mainly involving clearing dynamic sets of data in separate cubes, times where I needed to push data from one cube to another cube on demand, and obviously, I needed to clear the data in the target cube before loading.

As usual, I'm going to simplify the example and talk about the relevant stuff only, once you get the idea you can unleash your inner demon and find a useful application for it, Beleive it or not, I used it to make me a chicken caesar wrap and it was yummy albeit a bit salty!(just don't take my word for it)

I have two cubes, one BSO cube for data entry and another ASO cube for reporting, and I needed to push the data from one to another, it is a normal case every one of us is bound to face at some point in any implementation, but in my case, there was an additional twist as follows; I only need to push the Budget data for specific combination (Entity member(s)) without touching the Base scenarios (Budget, Forecast, Actual..) and the first thing that will come to your mind is to use Entity/Scenario as a prompt/variable and build the logic accordingly, but this not work in my case.

To better understand the dilemma, I'll show below an example of my data intersections:

Clearly, from the sample data shown above, you can see that Entity & Scenario dimensions are sharing the same members for two different use cases, so I need a 3rd dimension to determine the unique intersections for each of the data sets, in this example I have simplified it by showing the Period dimension, but in a real life this can vary.

So in my case the difference is the Period member used, so to clear data for my Budget scenario (Manual) I'll have to delete the Month period members only, having said that let me break down the solution and see where we can have that extra tweak:
   
1. Business rule (exporting the specific data region and calling the Maxl script)
2. Essbase load rules 
3. Maxl script to clear data and load exported file

I'm going to have two business rules (one for manual Budget scenario and another for base scenarios), as for the load rule you can have one generic rule, and finally the Maxl script, you can also have one script with a tweak and I'll show how in a bit.

Below are the business rules I'm using:

1. Base scenarios with BegBalance


2. Budget manual scenario with months

You can see a lot of substitution variables, single and double quotes... which I'm not going to talk about, you can read more about it in my previous post. Now in a nutshell, what I want to do is that based on the scenario, I want to pass to the Maxl script the region I want to clear in my ASO cube, this way I can have one generic Maxl script with flexibility to clear data in non-unique data intersections.

So to get on with it here is my Maxl:


Closer look at my alter statement (important to have at least one space before the semicolon):

Here is the tweak, I'm having a dynamic alter statement in my Maxl script, taking the 6th, 7th, and 8th parameters from either of the business rules calling the script, producing one of the following statements:

First case (base scenarios and BegBalance):

     - 6th parameter: '{([BegBalance],[
     - 7th parameter: E100100200 (Entity run-time prompt)
     - 8th parameter: ])}'


Second case (Budget scenario with months):

     - 6th parameter: '{CrossJoin([YearTotal].Children,{[
     - 7th parameter: E100100200 (Entity run-time prompt)
     - 8th parameter: ]})}'


It works perfectly, here is the log:


Voila!


May the Cosmos be with you!

Thursday, September 22, 2016

FIXPARALLEL, DATAEXPORT, Substitution Variables and MaxL

This will be a quick and easy, I faced a dilemma where I needed to export data from one BSO application to ASO application, and the data was as sparse as the cosmos quite literally, I wanted to do the following to get that done:

1. Define my substitution variables (for moving environments, file locations etc.)
2. Export my data using DataExport
3. Clear target data using MaxL
4. Load exported data in ASO application

Very simple steps, I actually made it a bit lighter in here to show the relevant stuff only. Now before I go into more details my main issue was exporting data, so first  tried using the following code:


This works perfectly for well-defined intersections, and small databases, in my case it was taking more than 30 minutes to export the data. So I decided to use FixParallel instead and fasten the export process, so I replaced it with:

It works perfectly, and now the main reason I'm writing this post when you use DataExport with FixParallel you get an export file for every thread you have, so in my previous code I'll end up with 6 files as shown below, the first file is the one I'm getting after executing the first code. (ie no fix parallel)

I'll show how I managed to load the six files without hard coding the files names in MaxL and using substitution variables (old school I know), making this a bit more easy to handle and maintain.

So first I defined the key variables as follows (The bolded lines are the actual values:

1. &MaxLLocationDoubleQuotes  ("C:/Development/Scripts/PushData.mshs")

2. &PrivateKey  ( 12391823791823719823713,1283719283791832 ) This is used for the encrypted MaxL, I'm assuming at this stage you already know this!

3. &AdmUser (324872938472934782347923842937429) Encrypted username

4. &AdmPassword (2348729384445472983742934) Encrypted password

5. &LogLocationSingleQuote ("'C:/Development/Logs/PushData.log'") I'm Including a double quote with the single quote on purposes, will explain later

6. &ExportLocationSingleQuote  ("'C:/Development/Export/Sample_Lv0_T")  AT THE BEGINING I'M INCLUDING A DOUBLE QUOTE & SINGLE QUOTE, BUT AT THE END I'M JUST PASSING A DOUBLE QUOTE

7. &ErrorLocationSingleQuote ("'C:/Development/Logs/PushData.err'")

Now to elaborate on the SingleQuote variables, I'm planning to use RunJava MaxLFunctions to call the MaxL file, in MaxL I need the locations in single quotes, hence I'm wrapping  them with double quotes.

Now comes the sexy bit, which I found out, is the ExportLocation variable, I'll elaborate a bit more on this. My export file location is C:/Development/Export/ and I know I'm going to have 6 files in that folder for every thread in my script, so I wanted to automate this bit without actually referring to every file in my import command in MaxL, so I wrote the following:


Assuming you know how to use this CDF function, as you can see I'm passing the following to the function:
1. MaxL file location in double quotes
2. Private key for encryption
3. Admin user
4. Password
5. Log location in single quotes
6. Export file location in single quotes (Remember only the starting quote is there without the ending quote)
7. Error file location
8 "1.txt'", "2.txt'", "3.txt'", "4.txt'", "5.txt'" and "6.txt'" (For every file exported using FixParallel and I'm ENDING IT WITH A SINGLE QUOTE)

This CDF takes MaxL file location on the server, private key for reading the .mshs file, and admin user and password, now since I didn't pass the server name here any parameter passed after the mandatory ones will start as $3 and so on, this order is important.

So now what I'm going to do in my MaxL is simply add 1.txt', 2.txt'.....6.txt' to my export file location which is static.

This is my MaxL.


Yes I'm telling Essbase to load the file using two parameters, so ...:

import database Sample.Report data from data_file $4$6 using server rules_file 'LoadRule' on error write to $5;

In this case, $4 will give me 'C:/Development/Export/Sample_Lv0_T and $6 will give me 1.txt'  and will end up with the complete file location 'C:/Development/Export/Sample_Lv0_T1.txt'. I'll repeat the same for every thread I ran ($4$7, $4$8,....$4$11) and that's it.


Voila! hope this was fun :)


May the Cosmos be with you!

Monday, August 29, 2016

Simpler data loads with Visual Basic

In almost any implementation, at some point in the early development stages you need to load data files directly in Essbase using the lovely rule files before you even think of automating this process.

In some cases the data file provided may need a bit of messaging that is a bit too much to handle in Essbase rule files(replacing null values, multiple text replacements in the same column...), I will show a simple example in this post. (I'll be using an old version of Essbase, my 11.1.2.4 cloud based subscription has expired and I need to configure my own).

Take this very simple outline, I have three dimensions in my model.


And my data file looks like this.


I need to insert No wherever there is a blank cell in my data file, why not use Essbase load rules? well you just can't.


You cannot replace a null value in load rules, in this version you cannot even insert a replacement line unlike versions 9.x and later where you can define and add a replacement line but still it won't work.

So you have to do a little bit of massaging in your data file before it is ready for loading. Now if you are likely going to load the file number of times, and there is a good chance the content of the file may increase or decrease, in this case you want to have a VB script to format the file for you and after that you'll simply load the file.

In my source file, I'm assuming column A will always have data, so I can use it in my script to figure out my last row, and then accordingly replace all NULL values for column C from C1 to my last cell.

Lets get on with it, first figure out the last record in the sheet.


Insert a dummy value in the last row for column C (You'll need to repeat this step say you have two columns you want to format and so...)

To make things more visual, this is how your file will look after that code is executed:


Now I'll replace null values with "No".

And my file looks like:


Finally delete the last line inserted.


Now this script will replace any file in the same format regardless if it is has 10 or 100,000 rows, pretty convenient if you ask me.

Now I'll save the formatted file in the folder:


And if you are into nitty-gritties like my self, you can make your life easier by calling a batch file (to run your MaxL, OutlineLoad utility....) and automate the the process from start to end.


Voilà!


May the Cosmos be with you

Monday, August 22, 2016

@CalcMgrDoubleFromString

I'm back to blogging, at a very slow pace though, I moved countries (continents to be specific) and the past couple of weeks have been very busy.

We all know the dynamic date members we used to create to manipulate dates (Year number, Month number etc...) like the following:


The idea here is to use this dynamic calc member with any intersection and return the year as in number for that specific combination (useful when calculating depreciation..).

This formula works perfectly without any issues what so ever, and it has served me so many times in so many implementations, there was only one thing that bugged me with it, and that is having the first year hard coded, now there is nothing wrong with this kind hard coding if you ask me, since in this case first year will never change.

I used this syntax from Essbase 6.5.7 till System 11.1.2.3, now the interesting thing is the new CDF function @CalcMgrDoubleFromString which was introduced in 11.1.2.3.500, thanks to this lovely CDF our life is a a tiny bit more simpler (not really).

So now we can have instead of the above, this one liner which returns the year number to which you can add 2000 if you want YYYY format or leave as is for YY:


That's for this evening.


May the Cosmos be with you

Thursday, July 14, 2016

Break - Be Back Soon

I'm currently on a short break from blogging, I'm moving to a new country and things have been hectic lately.

I'll be back soon.


May the Cosmos be with you.

Monday, June 6, 2016

Creating Folder Shortcuts in Hyperion Planning


In this post I want to show how to create folder shortcuts in Hyperion Planning, take this case where you have a complex reporting/folder structure in Workspace, and you want to make it simple for the end user to navigate to the relevant folder and open the reports or files.

Here is my Workspace folder structure.


I want to create a shortcut to let the user navigate to the folder "Variance Analysis", so to do this I need to know the UUID of the object, right click on the folder and copy the UUID.


Append the UUID to "http://HYPERION-URL:9000/workspace/WorkspaceLaunch.jsp?uri=index.jsp%3fmodule%3dwksp.relatedcontent%26repository_uuid=".

In my case, it is"http://HYPERION-URL:9000/workspace/WorkspaceLaunch.jsp?uri=index.jsp%3fmodule%3dwksp.relatedcontent%26repository_uuid=0000015506a7fd9c-0000-e1d2-7f000001".


Now simply go and create a menu, select type as URL and paste the link.


Here you go.


Until we meet again, May the Cosmos be with you!

Tuesday, May 17, 2016

Oracle Hyperion Planning VS IBM Cognos TM1 Series - Part 5 (Creating Users)

In this post I will show how to create a single and group of users in Hyperion Planning and Cognos TM1, I will cover the creation part only going into provisioning and more details which I will cover in a later post.

Let get on with it.

Hyperion Planning
We create users in Hyperion Shared Services, so log in to your Hyperion Workspace and navigate to Shared Services.


Expand User directories, Native Directory and right click on Users as shown above, enter your username and password and click create.


Now search for the user.


Pretty simple really, now suppose we want to create 100 users, what we need to do is use the Lifecycle Management utility to export users from Shared Services, edit the exported file and simply import it back again. 


Write down the list of users in the following format.


Import the file back again using LCM and you have your users in one go and that's it.


Cognos TM1

Now let us create our user manually (aka client in TM1), we can do this using TM1 Architect or Performance Modeler, right-click on your application server and navigate to Security->Clients/Groups...


Right click on the last row and Add Client, enter your client name.


And if you want to see the same only in Performance Modeler.


Now I want to create 10 users, and this is the part I love about TM1 :)

I will create a new Turbo Integrator process, with datasource set as None.


Go to Advanced Tab/prolog section, and use the AddClient() TI function, save the process.


Now run the process.


That's it :)


Yes, I agree TM1 Turbo Integrator rocks. I'm going to keep it nice and simple in this post so that's it for today.


Until we meet again, May the Cosmos be with you!